Monday, May 27, 2013

Aft strut attach

A little effort on the aft strut attachments...

Drilled the attach points in the forward strut (I'm out of AN3-16's now, so had to put in a bolt order).  Also I put the sleeve into the aft strut and put in six rivets per the drawings.  Then with some filing, the aft strut can bolt in the correct location with just enough clearance to not rub.

I also did the other side, but again with the running out of bolts, it's not put together.
Here is the strut attach point on the fuselage.  I do have the AN42B-16A installed per Goat-3 here.  Still looking at options for the cabane attachment, so this counts.

Yup.  Every bolt/hole/fitting is one step closer.

Sunday, May 12, 2013

Forward strut attachments

Today was very productive!  I started with the right forward strut attachments, completing the bend and the through-hole on the aft plate.  Then I slid everything half-outside the garage and worked on the left to get it up to the same spot.

As with all the 1/4" attach points, I keep them as 3/16" holes until everything is held in place together and can be match-drilled to the full 1/4" diameter.  This might be overkill since it needs to be a sloppy 1/4" for a slip-fit pin insertion, but it feels better to do it this way.  The final match-drill is so much more satisfying knowing there is no slop.

The Goat 1, 2, and 3 all use an AN42b eye-bolt for the cabane attachment to the strut.  Since my cabanes were already built, they were too long to do this without remaking the aft cabane tube.  Instead, I'm trying to redesign the junction.

This is the right strut attach point with a first look at the new cabane attachment.  It's not exactly done yet.  For starters, the connection is just a tab that the strut pin goes through, which could slip off the end of the quick-pin if the bungees broke.  Much better to have two tabs so the pin has to fall out all on its own.  I'm still thinking...

Here is the tab on the cabane.  Like I said, I'm not totally sold on this alone.  I'm thinking about a bent tab similar to the Goat-1 compression ribs (G1W13) using the two obvious bolts.  Then again, I might space apart the two tabs on the struts and slide this next to the fuselage carry-through tube to be inside the strut tabs and therefore captured.  We'll see.

I did shorten the main cabane tube by about a half-inch.  That was a definite committal moment.  But you know, reworking this joint is maybe a good way to show how forgiving the "boltalicious" Goat construction is.  Need to make a change after it's all built?  Just unbolt, make a new whatever, and bolt it back in.  Pretty awesome.  No welding or re-riveting needed.

One consequence of attaching the cabanes along with the strut quick-pin is they are pinched in closer to the center-line than on the original Goat designs.  This means the cabanes pinch and interfere with the seat-back, which is now too wide.  I could lean the seat forward a bit (which is what I did for now), or narrow the upper seat tube.

Finally, here is how I spent most of the day, with Goat hanging half-way in the garage and half-way out.  The forward struts are simply taped on the leading edge as a mock-up, but it was enough to make some measurements and sort out the lengths needed for setting the dihedral angle.

Oh also, the forward sweep cables really do make a big difference in holding the leading edge in place ... right at head-height in this orientation :-)

Saturday, May 11, 2013

Starting the struts

Had to make a few additional brackets for attaching the wing struts.  Break out the measuring tools, hacksaw, file, and clamps plus some elbow-grease for good measure.

I wanted to start with the forward strut at the fuselage first so I could jig the whole thing outside and measure the exact correct length for the strut.  And I also wanted to cut two of everything to take care of both left and right at the same time. 


But first, I need to sort out converting the Goat-4 carry-though to a Goat-3 style.  For the strut attach points themselves, I'm planning to follow the Goat-3 drawings.  It's a change to the cabanes too... that's the fun one. I'm not sure what I'm going to do for that one yet.

Saturday, May 4, 2013

Beautiful spring day for a Goat

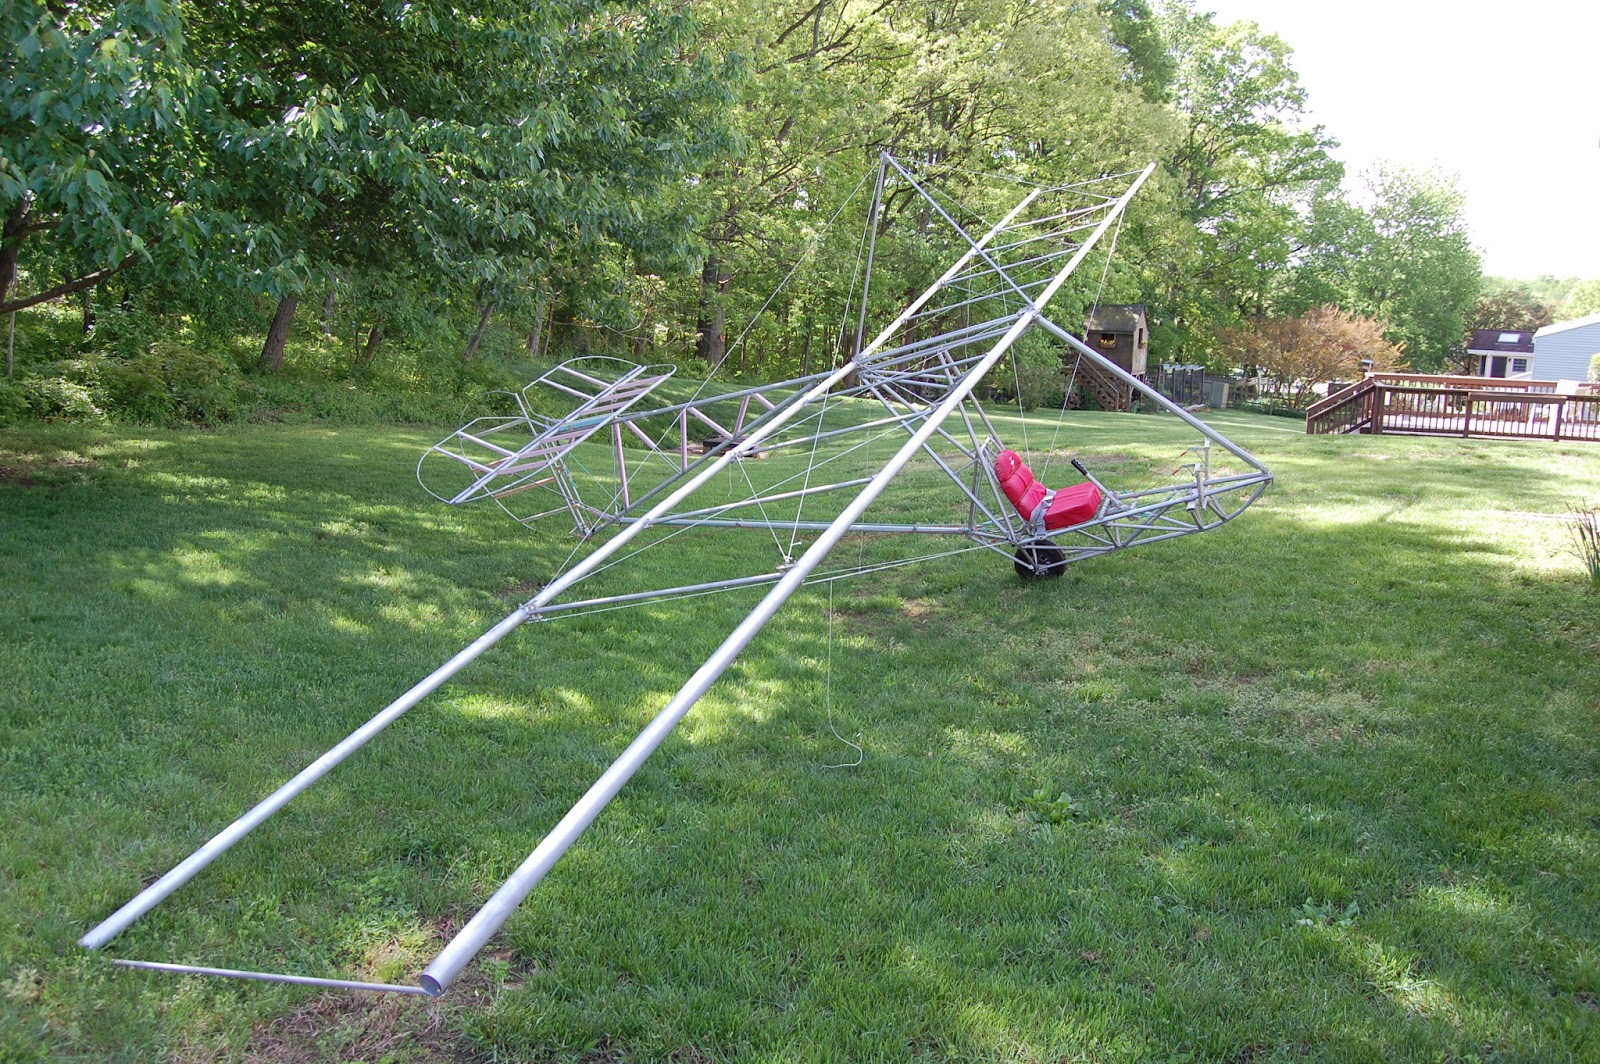
I'm sitting outside on the porch looking over an amazing sight: the first time Dan's Goat has been assembled with the wings on.


Now I started down the path of a cable-braced wing and will be switching to using wing struts, so use your imagination to remove many of the temporary lines.  However, this is the first time I have the big-picture view of sitting in the pilot's seat and looking down the length of the wings above me.  Such a cool sight.

During assembly, there were a few lessons learned already.  Handling the wings is a challenge at this stage, with a lot of flexing and wobbling to move them into position.  I know with covering on they'll get more torsionally rigid, so there's no cause for concern, just noting an 18ft by 4ft panel is big to move around.  The LE and TE pins aren't too tough to align and install.


Next is the fuselage attachment.  This involves awkwardly standing the fuselage on the tail, pinning the LE tube, then moving the fuse into place for pinning the cabanes.  Now on the strutted version this will be different, but no doubt it's going to be a magic step.  I also definitely need a piece of carpet or something to toss on the ground and keep the tip of the fuselage from poking into the dirt.


Rotating the fuselage and wings up is going to be a lot easier with rigid struts.  Using some 150lb test cord I had laying around, I rigged up the kingpost and flying wires.  It definitely took pulling a lot more tension in the upper lines than I initially thought to keep the wing with positive dihedral.  There is a lot of stretch in my thin lines.  But once the wing and fuselage are triangulated together, they rotate up as a unit just fine by pulling on the nose to rotate everything up onto the wheel.


Since it's so nice outside, I had to attach the tail as well.  This too is a little awkward as the fuselage attach point is leaned a little so the vertical tail assembly needs to be rotated as well.  Attach the lower pin first, then the upper pin, not too tough.  The horizontal stabilizer is a piece of cake from there.  Then connecting all the control cables is quick and painless.  Viola, Goat!


What else can I say?  It's coming together.  This feels like I've crossed the half-way point.  Structurally, I have the struts, their respective attach points, and the jury struts remaining.  Then it's all secondary structure for the wing: lots of ribs, wing tips, control surfaces, hinging, control rigging, and d-tube sheeting.


Oh I also weighed the current structure while assembled: 62.8 + 6.8 + 17.2 = 86.8lb  This doesn't represent any particular reference state, but does give me a warm-fuzzy that there is 60-something pounds to stay in the Part 104 glider class.  The struts aren't light and there is a lot of aluminum in the ribs and control surfaces to go.  Then covering / paint.  Fingers crossed guys.

Locations of visitors to this page