I took a break from the trailer to build a skin on frame canoe. Behold:
I've
had these plans since May 2018, and it was finally time. It was
relatively quick and was a quite relaxing process to build with wood.
The techniques are similar to building a wooden airplane, but that idea
is terrifying, so no wooden airplane builds in my near future (hmmmm,
Carbon Dragon!?).
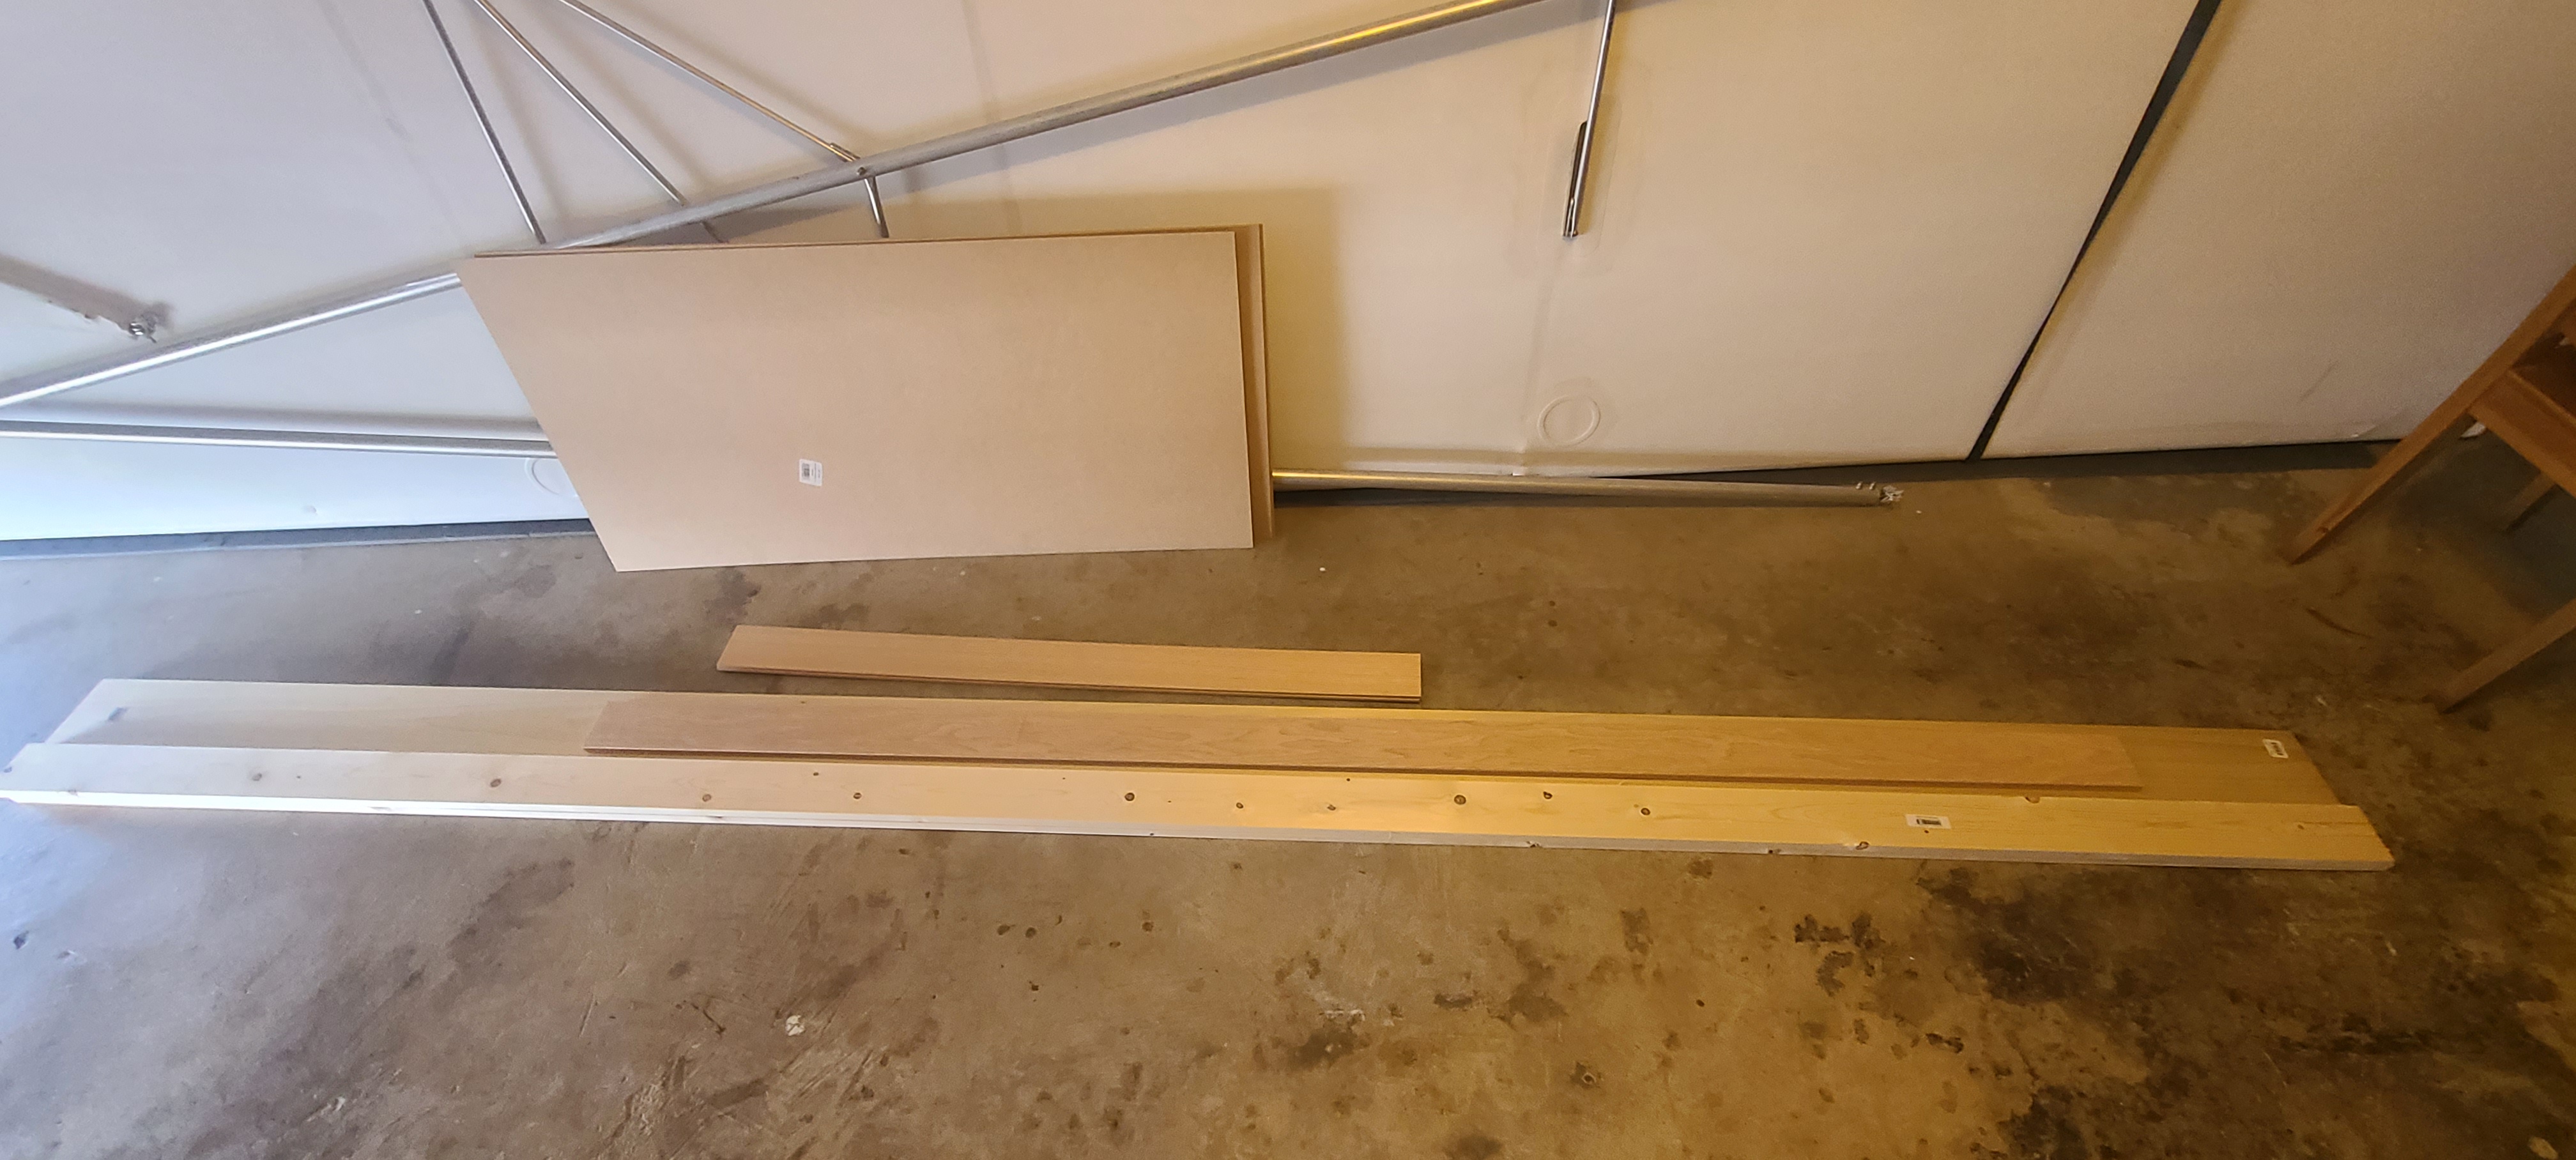
The canoe is a Snowshoe 12 from Geodesic Airolite Boats (
https://gaboats.com/). It is built from plans and a small amount of kiln-dried premium hardwood lumber from Home Depot.

The
build process starts with creating a strongback, which is just a
box-beam with legs.. Bulkhead formers were cut from 1/8" MDF and
screwed to the strongback next. This is essentially all the tooling
required.
Next
is the milling of all the sticks. I bought a new thin-kerf blade and built a new
zero-clearance insert for the table saw for this milling operation. The
plans have a good cut-list. It was surprisingly straightforward
to turn a piece of oak and popular into several smaller pieces. The
sticks are then beveled, sanded, and can be stored inside the strongback.
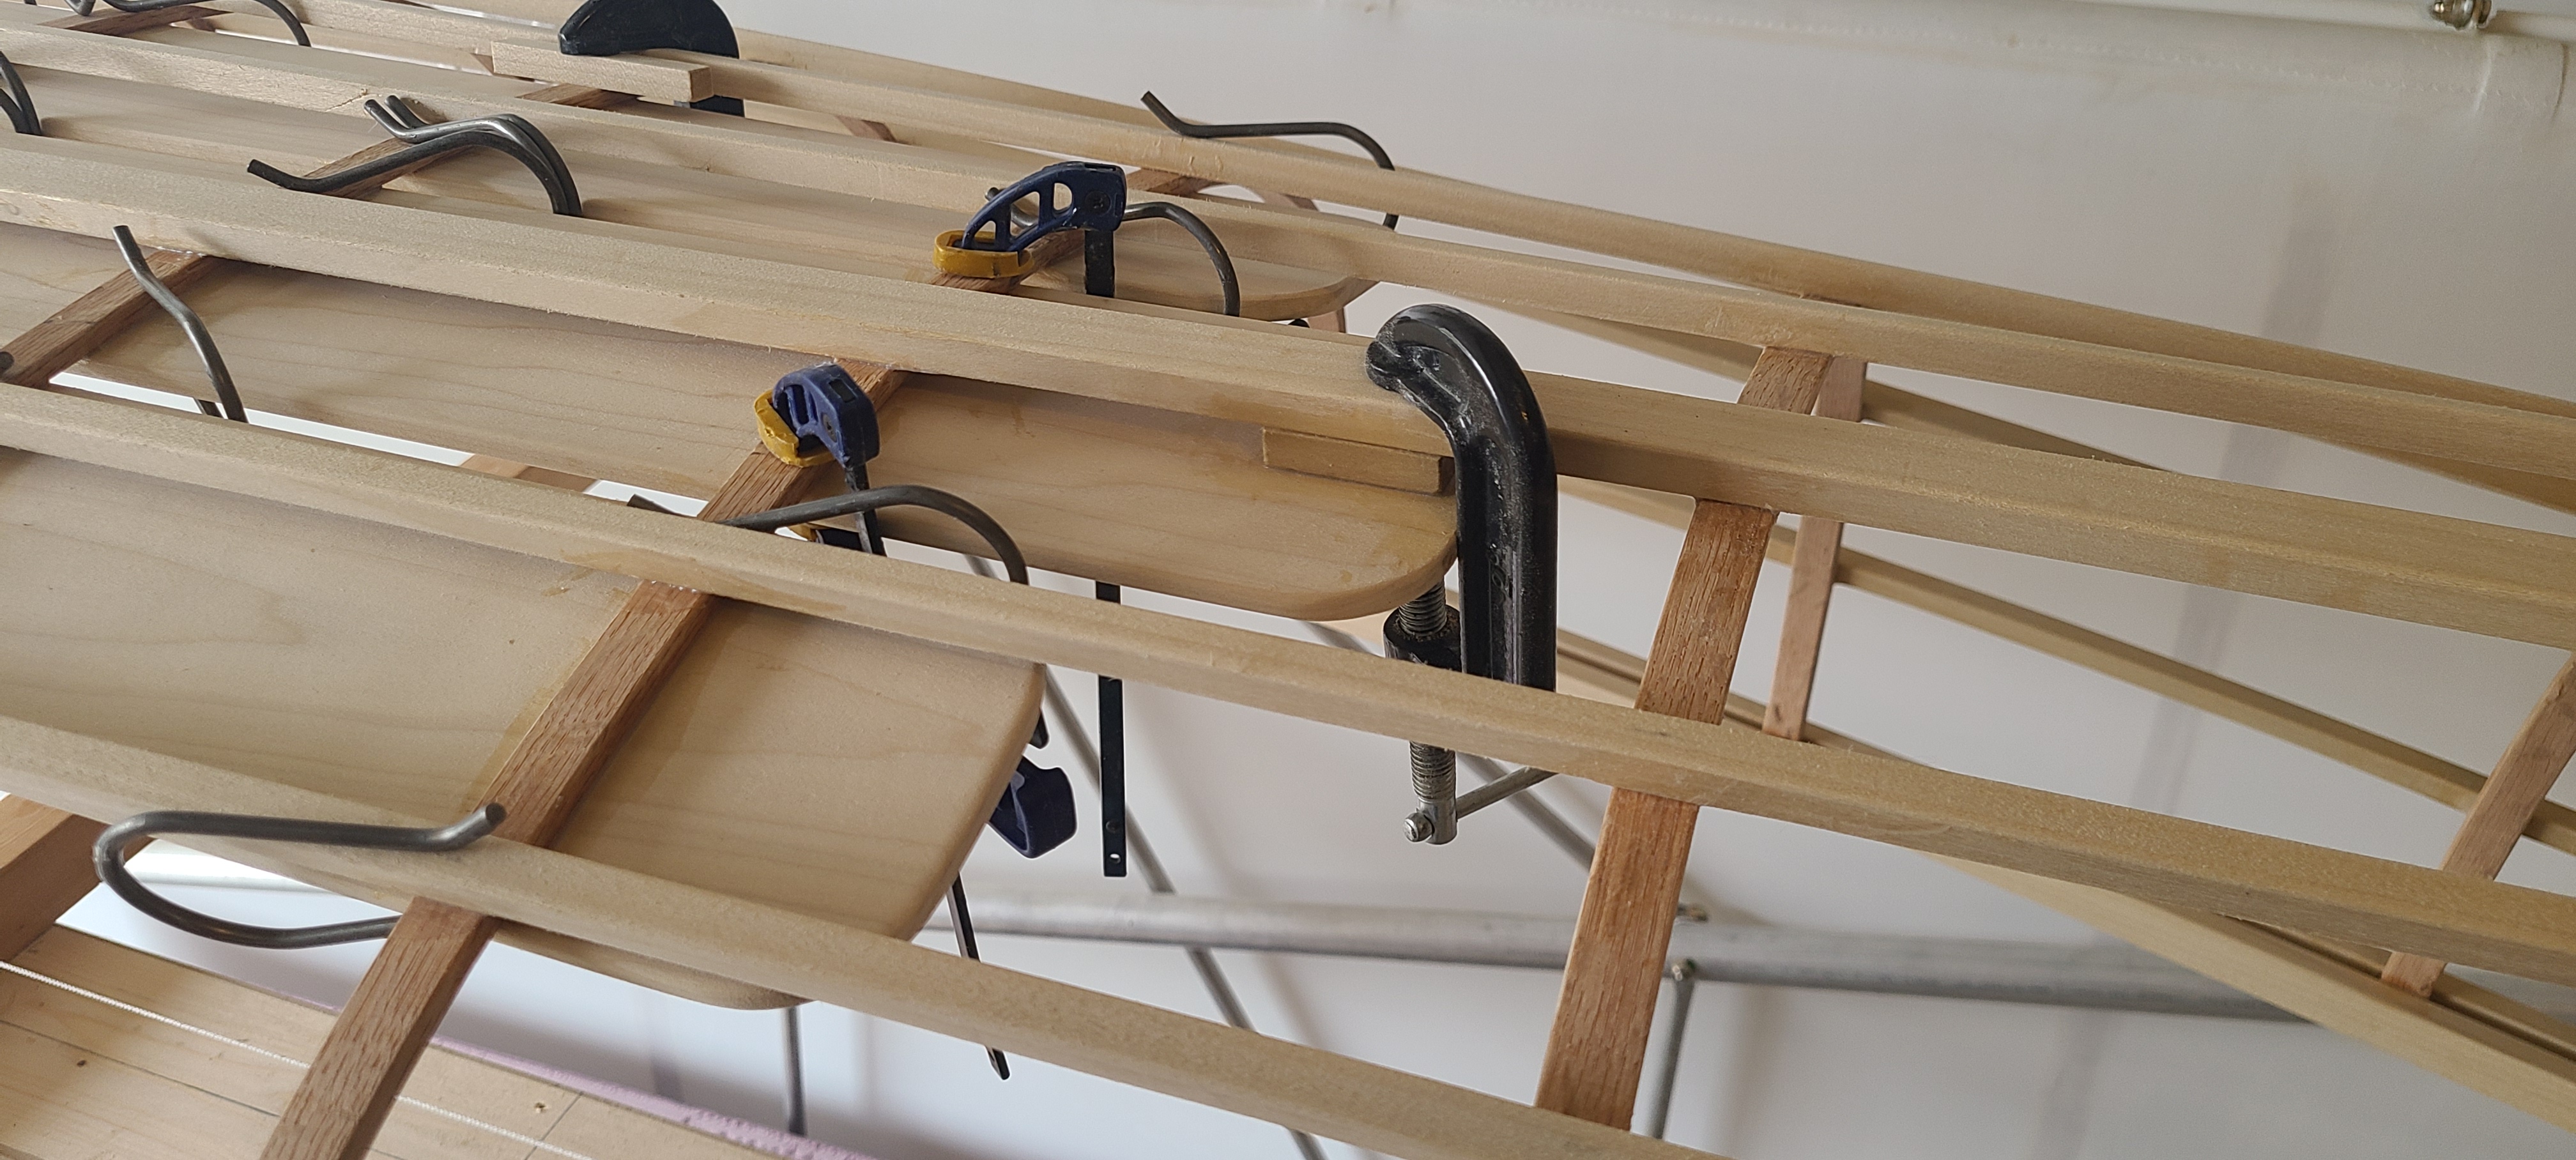
The
stem and keelson are put onto the formers first. I should have used
epoxy, but used Titebond II, which is not rated for water immersion.
The poplar stringers are then put into slots in the formers to start
creating the shape. I did buy a small Japanese pull-saw and a small
hand plane to help with beveling the stringers to fit against the stem.
This was originally daunting, but was not problematic and was quite
satisfying. The very sharp plane blade made easy work of the soft
poplar.

After
all the stringers, it was time for steam-bending ribs, which is totally
new to me. I built a foam box using drywall screws and aluminum tape
(this box did not survive). The first source of steam was a
tea-kettle. The electric kettle worked okay, but was not sustainable. I
did buy a steam generator, which had enough water to run for about an
hour or two.
Bending
ribs worked quite well. I left them in the steamer about 30-45
minutes, which is WAY longer than recommended, but this worked okay for
the kiln-dried oak. Pulling a rib out, bending it, and clamping it into
place was a two-person job with a 30-second time limit. We did break
three ribs during installation, but I used the broken piece at a
different place in the boat. Each rib took a BUNCH of clamps to hold in
place against the stringers. I used a combination of c-clamps and
Clamp-Its. Bending and epoxying in the ribs took about two weekends and
a week of evenings.


After
the ribs were bonded in, I took the frame off the formers and flipped
the canoe. This was super satisfying, as the shape started to come
alive. The inwales were fitted next, with each getting beveled to fit
in the stem area. The inwales were epoxied to the ribs and the ends,
with a stem block also. Fitting each bevel took a combination of rough
sawing, planing, and final sanding for flatness. Epoxy wants some tooth
for better adhesion, so the final surface texture was usually 180 grit.
The thwart gussets and the thwart itself go in next. I had leftover
1/8" birch aircraft plywood from a wooden clock project
(https://www.derekhugger.com/zybach.html) and a 1" dowel from creating
shelves to hang model airplanes on the wall. The thwart got a small
bevel to match with the angles of the gunwale and inwale, and the length
of the thwart holds the width of the boat.

The
floor went into the bottom of the boat next. I steamed these and had
horrible cupping issues at first. It took rotating the boards a couple
of times to even out the steam. The floors were clamped into the
structure with ALL of the Clamp-its and c-clamps in my collection, then
glued into place overnight. I did add a third floor relative to the
plans, thinking toward having a wider place to sit. The middle floor
end was somewhat unsupported, so a spare piece of poplar gave the end
better structure.


All
of the frame was then sanded and varnished with water-based urethane
spar varnish. I was very picky to clean squeeze-out during epoxying
steps, leaving no glue blobs to sand away.
A key feature of the
Geodesic Airolite boats is the Kevlar Aramid tows put in a cross-grid
pattern (hence "geodesic" in the name). These threads are for
transferring torsional and bending loads using the fibers in tension.
The tows are held in place with "Heat-n-Bond" "Ultra Hold" tape. The
HnB is a thin layer of hot-melt adhesive with a plastic release film
that allows ironing onto the wood. I wasn't immediately pleased with
the results, but got the hang of using HnB after a short bit. This does
work fine. I used only half of one roll (two-strand) of Kevlar, rather
than the two rolls the website recommends. I used two rolls of HnB.
After
all the Kevlar is installed, the tows are varnished to become stiff,
and the tows are each tightened by softening the HnB while holding
pulling tension on the tows. This worked fine.

And
now is covering. The gaboats.com website used to sell 3.7oz/yd2
unshrunk Dacron fabric, but now only sells 8.6oz/yd2. I wanted to keep
super lightweight, so found that Aircraft Spruce sells "heavy" certified
Dacron of 3.7oz. A caveat is that the certified fabric includes a
stamp stating as much, rather than being clear fabric. With no other
option, I kept the stamps visible and called them "character." It took 6
yards of fabric.


Once
the fabric is complete, it's time for varnish. I put two coats of
clear gloss water-based urethane onto the fabric, but four coats is
required. (To be honest, I floated with just two coats, which was not
enough)
After covering, the cutwaters and keel are joined while
on the boat, and the rub rails are also installed. These are all
mounted with #6 3/4in and 1/2in long brass screws from Lowes. I picked a
reasonable spacing and just went for it. It was funny having three
drills - one with a drill bit, one with a chamfering bit (actually a
spot-drill), and one with a screw head. I decided not to epoxy these to
the covering so they are replaceable. These pieces are the last wood
in the boat. I put two more coats of urethane on the covering (four
total) and at least two coats on the keel and rub rails. It looks
AWESOME now.

The Snowshoe 12 is tricky to get into from
shore. I had to treat it like a kayak and step into the water first
before stepping into the canoe. It is quite tipsy relative to the wide,
flat-bottomed canoes I'm used to. But, it is a joy to see the water
through the covering, and it'll be interesting to get used to that over
time.

In
case you were curious, this project took less than two months from
buying wood to floating. I had a week-long work trip and didn't
dedicate every weeknight or weekend to this. I could see building a
second copy in about a month as the fastest possible, but that pace borders
on sounding like work.
The oak looks awesome. The white poplar
wood is fairly soft and looks boring compared to the recommended spruce
fir, but, this was available. The hardwood dowel and urethane varnish was from Home
Depot. The birch ply was from Woodcraft, but a hobby shop would have
aircraft ply as well. Brass screws were from Lowes. Other tools (the
pull saw, hand plane, and steamer) came from Amazon.
That was
quite a side project, but hopefully you readers enjoyed seeing something completely
different. I'll have a few paddles and then will probably get back to work on
the trailer for Goat. Spring is lovely weather to work on the trailer
again!